Saturday, October 18, 2014

HSF14 Challenge #19 - HSF Inspiration

I must admit that I was really lost on this one.  I think there were just too many options, and I poured over the boards again and again wondering what I should do.  Plus time was still an issue, and I'd picked up a commission in the last week that needed my attention.  (Fortunately, it will serve well for Alternative History.)  But on another review of the Art Challenge, I remembered how much I'd liked the recreated jewelry by Debbie Mac Rory, seen here. I used to make jewelry all the time before sewing took over my life.  I thought it would be fun do make some again, plus I could make something to go with my big gown project.

I searched through pages of Edwardian and 1910's jewelry to find something I wanted to recreate. A lot of it was the sort I had neither the budget nor the tools to make.  But I really took to some of the multi-stranded styles.

Edwardian Amethyst Festoon Necklace


With no decent beading stores nearby, I had to make do with what I found at Joann and Michaels.  I bought gold chain, spacers, jump rings, and some pretty gold pendants to assemble my necklace.

Those giant pearls weren't working for me though.  I popped them out with pliers.

It only had four rings on the back and I needed six, so I added spacers to the back to give me an extra ring.


This piece had an open lattice design, so I just looped the extra rings through it.

I couldn't find stones in the colors I wanted, so I created an enamel effect by painting the centers with gel nail polish and then finished with Modge Podge Dimensional effects.  I'm pretty happy with the way it turned out, although when my gown is done, I will probably adjust the length, and possibly tweek the color a tiny bit.

The Challenge: HSF Inspiration

Fabric: None
Pattern:  None
Year: 1910's
Notions: Assorted jewelry findings
How historically accurate is it? The style looks right, but given that it was assemble with pieces from the local craft store, paints, and pliers, I can't really say much for the construction. 

Hours to complete: 3-4 hours because of the painting.
First worn: Not yet.
Total cost: $20-25ish?

And the result:

Came out a touch more purple than I wanted, but I can live with it.

I think I need to make the "stone" a bit higher, like a cabochon.


Wednesday, October 1, 2014

HSF14 Challenge #18 - Poetry in Motion

Okay, so poetry has never been my thing.  I tend to like silly children's poems better than deep soulful poems.  But my plan for doing a dress themed after my favorite silly poem was scuttled when I learned that the poem must actually mention clothing specifically.  Well, shoot.  I found a poem about a golden gown that would work for the Edwardian gown I'm hoping to make this year, but that keeps getting pushed out.  I turned to song lyrics to see if I could find any clothing themed ones that would suit.  Pretty last minute, I found an Andrews Sister's song called "A Zoot Suit (For My Sunday Gal)."  I overlooked it a couple of times, because I had no intention of making a zoot suit in a week.  But I finally read through it and found this verse:

I want a brown gown with a zop top
And a hip slip, and a laced waist
In the sharpest taste to see my Sunday man
(In his zoot suit)

I usually say I don't have a favorite color, but brown is definitely high up on my list.  A brown gown sounded just right.  I wasn't sure what a zop top and a laced waist entailed, but I needed to keep it simple, as I'm running behind again.  So I reached for the 1920's again, figuring a simple square-cut flapper dress wouldn't give me too much grief.  I hand drafted the top, choosing a high neck in front and a bit more of a dip in back.  I cut a basic skirt shape, just slightly a-line. Once I had it all together, I cut the hem into a diagonal, like this dress:

Ivory dress with black and gold sash by Callot Soeurs, French, 1928. The Goldstein Museum of Design.


Although not before experimenting with a few different styles:


I used a silk/rayon burnout velvet in dark brown, with bits of peach and purple.  It sounds like an odd combination, but I quite like it.  I happened to have some poly faille in my stash that I used for the sash and drape.  I've always liked peach and brown together, and it really worked with the little peach hints in the fabric.

I serged all my edges on the dress, and then just turned them under and topstitched them down.  I did a double folded hem around the sash, and gathered one side to a piece of hem tape.  It just ties on at the moment, although I may add better closures later.

The Challenge: Poetry in Motion

Fabric: Brown Rayon/silk burnout velvet, peach poly faille.
Pattern:  None
Year: 1920's
Notions: None
How historically accurate is it? The pattern and most of the fabric is accurate, but it's all made on machine and partly serged.  

Hours to complete: Let's just assume I never know the answer to this.
First worn: Not yet.
Total cost: $30


And the result:


Hopefully I can get some pictures of it on me soon, so I can show it off better.

Wednesday, September 17, 2014

HSF14 Challenge #17 - Yellow

I did not get very lucky with the color challenges this year.  Although very fond of black and white, my two least favorite colors in the world are pink and yellow (in that order).  But I am determined to complete all challenges this year.  Maybe.  Hopefully.  My initial plan was to make a 1912ish gown that I planned as gold, but I thought I could work in rich yellows.  Life has intervened more than once, and it got pushed to Poetry in Motion, then to All That Glitters.  I had planned to make a chemise to wear under the gown for Terminology, but ended up making a cloche hat instead.  Fortunately, my cotton voile was a shade of pale yellow, so I bumped it a challenge.

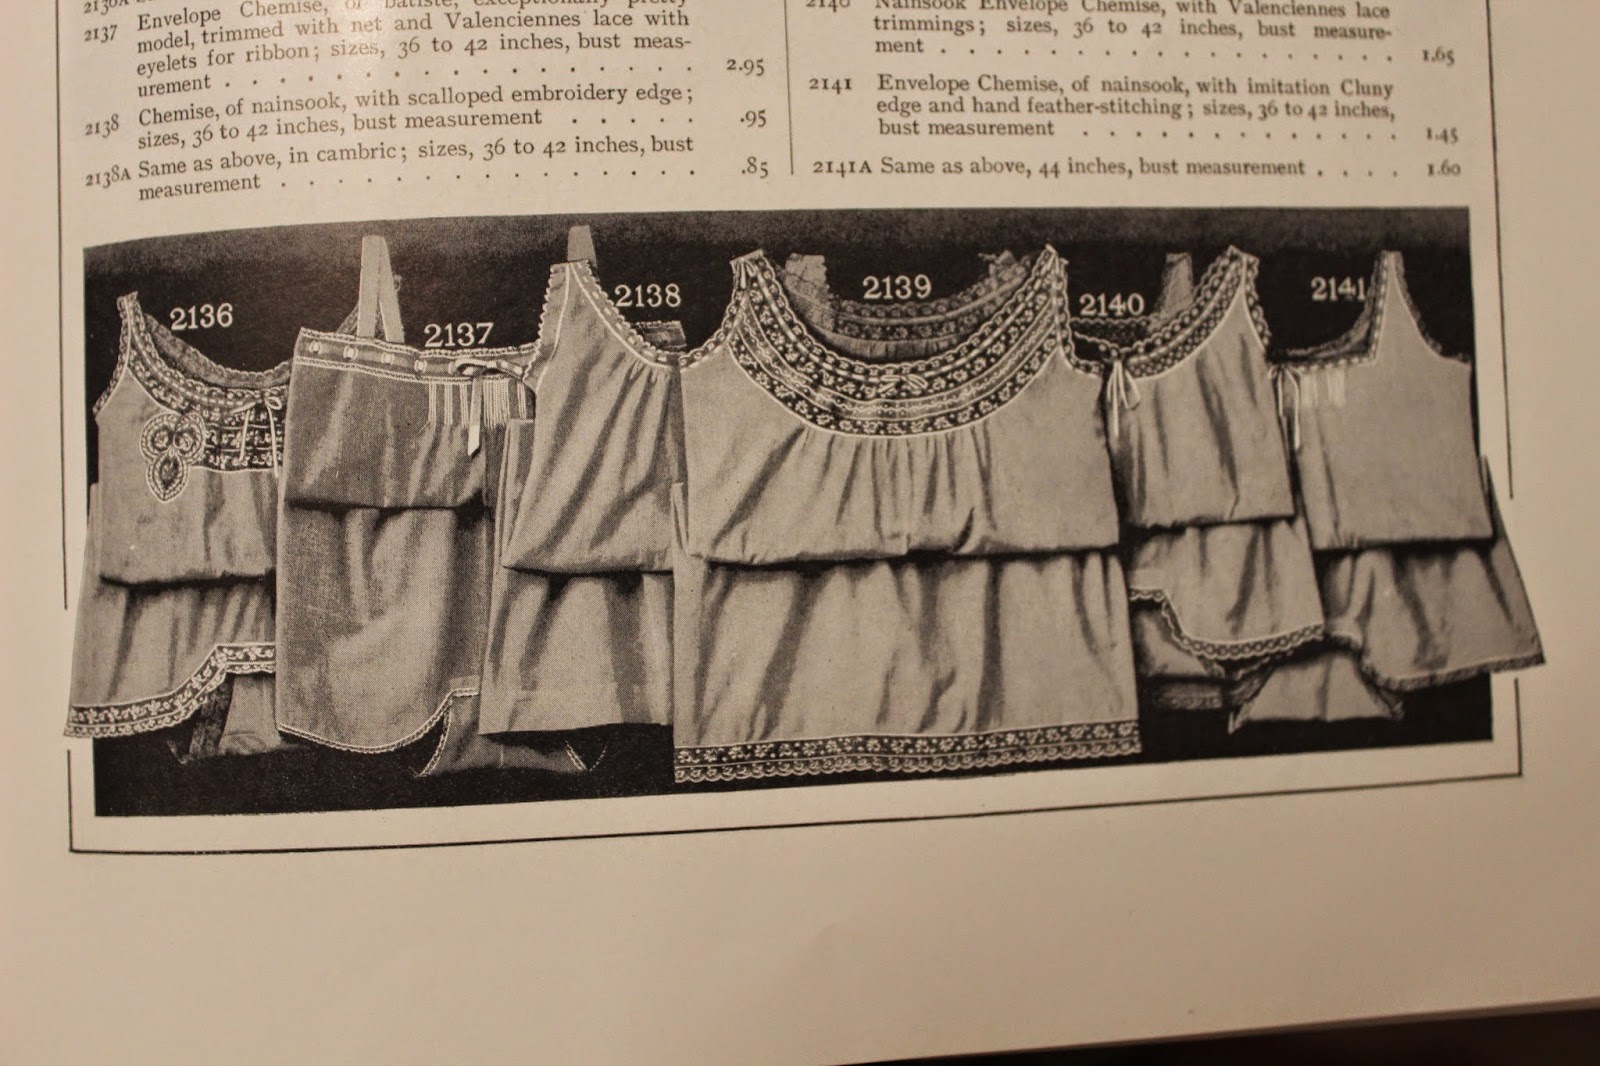
I have a fantastic reproduction of an Altman's 1915 catologue that I used for reference.  I didn't use a pattern, just a lot of eyeballing and trial and error.  I was planning to do an Envelope Chemise, but the mock-up looked a bit too much like a diaper.  So I extended the length and made a long chemise.  Due to illness and general grumpiness, I finished late and have no in-progress photos to share.  But I think it turned out well enough, and I don't despise the color.  It's a cotton voile I got for a steal at Fabric.com, but whoa is it sheer.  Gonna have to plan a pair of drawers if I ever want to wear the underwear on it's own.  I didn't get too historical on the lace, because I didn't think I had the time or resources to get the good stuff.  So I basically just picked what I liked at Joann.  The yellow grosgrain was a last minute substitute as it turned out my white grosgrain was too wide.  The entire garment is French seamed.


Inspiration pictures...plus a little help from Leimomi's pinterest


The Challenge: Yellow

Fabric: Yellow cotton voile
Pattern:  None
Year: 1915
Notions: White lace, white ribbon, yellow grosgrain
How historically accurate is it? The cotton voile is an appropriate fabric, and the construction techniques could all have been done that way.  The lace is probably less so.

Hours to complete: I couldn't even guess, I worked on this so intermittently.
First worn: Not yet.
Total cost: $25

And the result:

Finished chemise

The front

The back

Lace trim

Paired with my 1914 corset

Tuesday, September 2, 2014

HSF14 Challenge #16 - Terminology

Boy, I went back and forth and back again on this challenge.  Initially, I was going to make a cloche.  Then I decided to make the cloche for $10 or less and to make a chemise in cotton voile and/or lawn for Terminology.  Then my cloche tanked badly during construction, so I scrapped the idea until later.  Then, with Dragoncon approaching, I decided I needed more time for my late Edwardian gown, and pushed it back a challenge.  The cotton chemise happened to be yellow as well, so it will be seen for challenge #17, and I was back to the cloche for Terminology!  Whew.

I had an old beaten up felt hat that was purchased so long ago I don't remember why I bought it or how much it cost.  I steamed it and shaped it and tried to beat it into submission, but no matter what I did, I wasn't happy with the shape.
Original hat - it's seen better days

Post steaming


None of my attempt thrilled me.

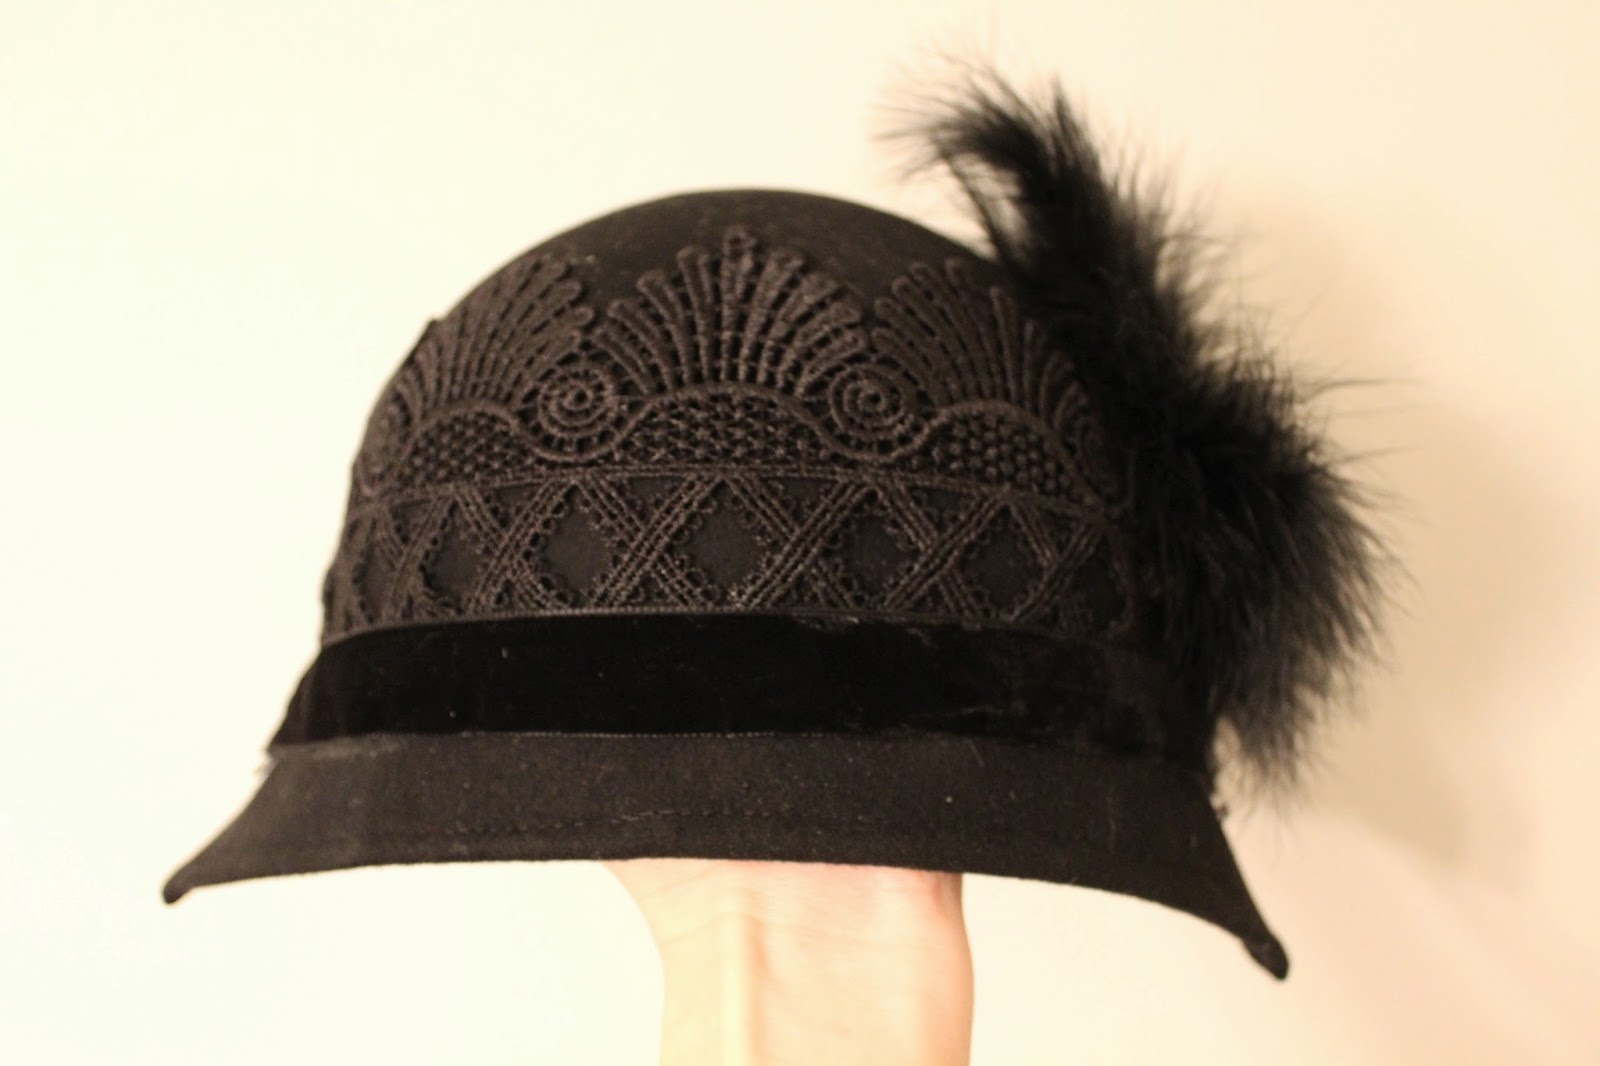
I pulled out a modern cloche that I bought from Target to show my Husband* to explain what was bothering me.  While not looking very period, the modern cloche had a nice shape and was better material.  The one I was trying to make wasn't fitting my head as nicely.  He asked my why I didn't just use the modern one.  I said I thought it would be cheating to just redecorate a modern hat, and I wasn't sure I was ready to cut it apart.  He asked me when was the last time I wore it.  Since I couldn't come up with an answer, I decided he was on to something.  So I set aside the old hat and started on the new one.  I pulled off the felt bow, opened the brim and found a plastic hat wire. I did not expect that.  I steamed it and reshaped it, and pinned the brim into a more period appropriate shape.  I tried a few different looks, and settled on a very short brim in back, a slightly longer front, and points on either side of the head.  I decorated the hat with some wide crocheted lace, a velvet ribbon, floofy feathers, and a rhinestone brooch.  Not gonna lie, it's mostly glued on, and I stitched the plastic wire back into the brim for shape.  I'm actually really happy with this hat.  It's a fun little cloche and I know it's something I'll wear around.
Original hat

Post steaming 

Shaped  and pinned

And stitched


With lace and velvet

Back 

Front
Fabulous feathers


The Challenge: Terminology

Fabric: None
Pattern:  None
Year: 1920something
Notions: Black wool felt hat, black crocheted lace, black velvet ribbon, black feathers, brooch
How historically accurate is it? Erm...in construction, not very.  But I think the look replicated the era rather well.  

Hours to complete: A few hours.  
First worn: Not yet.
Total cost: $20ish, although I can't remember how much the brooch cost

*Shout out to my wonderful Husband who knows nothing about costuming and isn't really interested, but will always listen to me rant or wax enthusiastic about it and offer support and opinions readily.

And the result:


And a little side project I built at the same time to take to Dragoncon:
The corset and the bracers are from my first Cap costume two years ago.  The only new bit is the hooded dress.


Wednesday, August 13, 2014

HSF14 Challenge #15 - The Great Outdoors

What a fantastic rebound from that last challenge!  After feeling pretty bleah about challenge #14, I managed to put something together I'm really happy with.  I wasn't sure what "The Great Outdoors" was going to allow, but I was hoping from minute one to make some sort of cape.  Once Leimomi outlined the options to include things that protect us from the elements, the cape was on.  

This is a picture that has floated around many a Pinterest board, and I've always loved it.  


The title only ever read "Edwardian Cape" and it never seemed to link to anything.  But it was unique and elegant and I wanted it to wear with the rest of the Edwardian garments I'm making this year.  So I clicked and clicked on every image of this cape I found until at last it led to...www.vintagemartini.com.  Alas, it had been sold.  I've bought from them before, and they seem to really know their vintage, so I trusted that any info on the cape would be accurate.  Just to be sure, I messaged the company to see if they had any pictures or info left on it.  They kindly replied that it had sold years ago and they didn't have any pictures left, but they could tell me it was from 1914.  

I used Simplicity 5794 to give me the basic cloak shape I wanted, and had to drape the rest.  I didn't make it quite as voluminous as the original (my budget wouldn't permit that much wool).


As usual, I got so involved with actually sewing, I hardly took any pictures.  I couldn't quite make out from the picture if the cape had a collar or a hood, but I decided to go with a collar.  Most of the other Edwardian capes I researched had collars rather than hoods.  I used a lightweight black wool for the outside and burgundy cotton sateen for the lining.  Maybe a little vampiric looking, but black is so classic, and the Edwardian gown I'm making will have burgundy accents. 

I bag lined the entire thing, and hand stitched some finishing details like the collar and the closures in the back.  I thought it turned out too small, so I had to add some small extensions in the back.  Then it turned out it was too big.  Harumph.  So I just made the closure overlap.  I think I could still stand to add a couple hooks and eyes to compensate for that overlap.  
But I'm pretty excited about the final product.  It looks better on me than on the dressform, but I just don't have the appropriate garments to wear with it yet.  So Celia will have to model in the meantime.  It's actually pretty reversible, but the cotton sateen tends to show wrinkles.  The wool doesn't wrinkle much and was a dream to work with.  And with a couple days to spare I managed to throw together a quick project just for funsies...picture at the end.

The Challenge: The Great Outdoors

Fabric: 100% black wool, burgundy cotton sateen.
Pattern:  A little Simplicity 5794, the rest self-patterned.
Year: 1914
Notions: Black hooks and eyes
How historically accurate is it? Pretty good on this one; following an extant garment from 1914, using natural fabrics.  Mostly machine sewn, but I managed not to serge this one. 

Hours to complete: Several evenings after work and a Saturday?
First worn: Not yet.
Total cost: About $50

Finished cape

The wool has a shiny pinstripe on the matte wool

Collar down

And up, looking particularly vampiric

I haf come to suck your blood...

Mwahahahaha

Closure hides under the back of the cape

Reversed

Wrinkly side out

I vould suck your blood, but I need to iron my cape.

Aaaaand my little side project...

A Star Trek themed pencil skirt to wear at Dragoncon.