
To begin the tale of this Nom Report, we must back up a few weeks to the beginning of our culinary experimenting. Regina was talking to her mother and debating holiday desserts, when her Mum commented, "We could always try making a Yule Log; I've always wanted to do that." Not long after that, Regina and Kami had a similar conversation where Kami also declared her interest in making a Yule Log. Then one day, while in a spectacularly bad mood, Regina decided to solicit requests from Facebook on what the next Nom-spiriment should be. A friend commented that she'd "always wanted to try a Yule Log." At this point it seemed that fate was telling us what our next project should be.
Regina set about studying recipes for the project. The trouble is that the recipes tended to all be totally different from each other. It was hard picking one that felt "right" since we were rather in the dark about the whole project. The icing and the filling were not a concern, since Regina can make buttercream and whipped cream in her sleep. The issue was the cake. The recipes were usually of two kinds: a torte-style cake with melted chocolate and lots of eggs, or a more cakey cake (Can't really explain that one better) with flour and cocoa. We liked the idea of using melted chocolate, but were afraid the lack of flour would make the cake too dense. Plus a lot of recipes used cake or self-rising flour, which we didn't have and weren't going to rush out and buy to only use half a cup. Finally we found the recipe below:
Cake:
2/3 cup flour
1/4 teaspoon soda
1/4 teaspoon salt
4 eggs
3/4 cup sugar
3 squares unsweetened chocolate
2 tablespoons water
2/3 cup flour
1/4 teaspoon soda
1/4 teaspoon salt
4 eggs
3/4 cup sugar
3 squares unsweetened chocolate
2 tablespoons water
Preheat oven to 350 degrees F. Grease a 15 x 10 inch jelly roll pan, and line with parchment paper. Grease paper. Mix flour, soda, and salt together. Beat eggs in a small mixer bowl at high speed, until thick and light - about 5 minutes. Gradually add the sugar, and beat until thick. Melt the chocolate and water together, and add to the egg mixture. Fold in the dry ingredients, and mix gently but thoroughly. Spread in prepared pan, and bake for 15 - 17 minutes, until the cake springs back when lightly touched. Remove from oven and turn out immediately onto a tea towel that has been sprinkled generously with icing sugar. Remove waxed paper, and trim of any crisp edges of the cake. Begin at the narrow end, and roll up the cake and the tea towel together. Allow to cool.
This looked like it had potential, so we were off. First hiccup: We had exactly three squares of unsweetened chocolate...and Regina put a little too much water in the bottom of the double boiler. Never let the water touch the bottom of the bowl. Kami got to find out first hand what burned chocolate looked like. So after a quick glance at Mrs. Field's version of the recipe, we decided we could get away with substituting semi-sweet. The second melting went without a hitch. Oh, and Regina hates melting chocolate and water together, so skim milk was subbed for the water in the recipe.
So the cake went into the oven (parchment paper is your friend):

And we made the filling. To make something a little more exciting than plain old whipped cream, we made Marcel "Death by Chocolate" Desaulniers' Speckled Cream. It's simple and yummy, although it has to be under lock and key to protect it from Regina's Husband.
Speckled Cream
2 cups heavy cream
2 tablespoons sugar
1/2 teaspoon vanilla
4 oz finely grated chocolate (we used semi-sweet, but you can also use milk chocolate)
 Combine the heavy cream, sugar, and vanilla in a mixer. Beat on medium speed about 30 seconds, then increase speed to high and beat until stiff peaks form. Fold in grated chocolate.
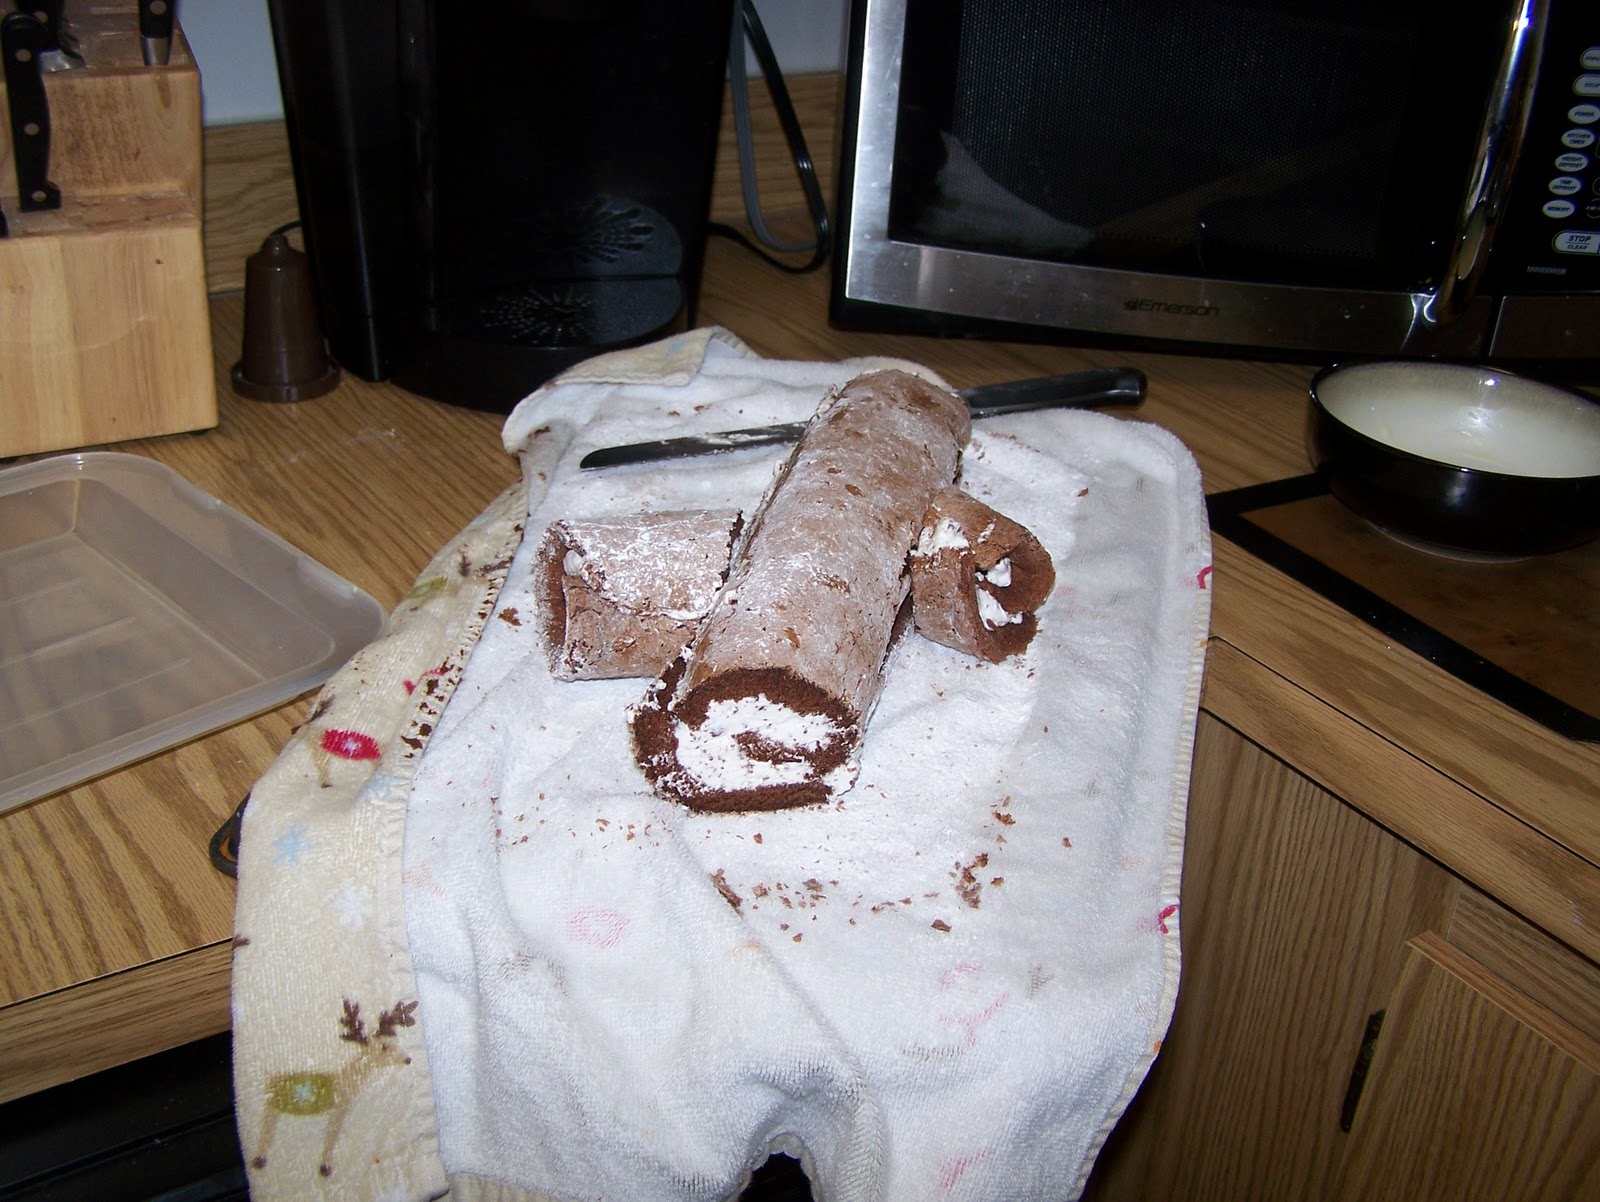
 When we took the cake out of the oven, we forgot to take a picture, but we were immediately concerned. The top was supposed to spring back, but it had a bit of a crust and cracked. It's possible we over-beat the eggs. But we forged ahead and rolled it up (longways, despite the instructions):
And went to make the icing. When the cake cooled, it was unrolled:
 |
| Oh dear. |
It is not, in fact, supposed to be in two pieces. Kami suggest we soldier on and attempt to roll it up anyway, cause it's an adventure, right? So in goes the filling:

And we roll it up:
 |
| Cause that's how we roll. |
Yes that is a giant crack in the side. We could just say it's the seam, but:
 The other side has one too, and it's even worse. At this point we have redubbed the dessert the "LOL Log" because we are laughing so hard. Kami valiantly points out that in the picture on her recipe, they HAVE CRACKS TOO! We cling to this image as proof that we do not suck at this.
 Onward, cooking soldiers; we cut off the ends to make the branch-stump-things:
And do a crumb coat of icing. For those of you who do not bake, this is a thin coat of icing that goes on first to collect and glue down crumbs, so they don't get in the pretty topcoat of icing. This being Kami and Regina, we use the term pretty rather loosely.
 |
| Crumb Coat |
 |
| Top coat, with "bark" texture. Just draw a fork through the icing. |
 |
| First slice |
 |
| And it didn't fall apart! |
Results: It's a lot of work, but not as bad as we thought it would be. Once we rolled up our tragically pathetic looking cake, we were able to glue it together with filling and icing, and it didn't look too bad! Taste results...SWEEEEET!!! We don't mean that in the "dude, awesome" kind of way. We mean in the "might rot my teeth, oh, god, now I'm diabetic kind of way." Regina was only able to eat half a slice. Kami made it through her slice but admitted it was almost too much. However, she did take the leftovers to work and said that it mellowed out the next day and didn't seem as sweet. She said it stayed nice and moist and was a big hit with the co-workers. Would we make it again? Yes, probably, although not anytime soon. And in the future, we will stick with the unsweetened chocolate.
Note: Regina does not use a recipe for buttercream icing. We can tell you it uses 1 stick of butter and one teaspoon of vanilla. Then she just adds cocoa until "it's chocolate-y enough" and alternates confectioner's sugar and milk until "it tastes right." Sorry about that.
I understand the icing recipe perfectly, as that's the way I cook too!
ReplyDelete